Free All-in-One Office Suite with PDF Editor
Edit Word, Excel, and PPT for FREE.
Read, edit, and convert PDFs with the powerful PDF toolkit.
Microsoft-like interface, easy to use.
Windows • MacOS • Linux • iOS • Android

How to view the table properties in WPS Writer
1. Use WPS Office to open the document.
2. Click the button in the upper left corner of the table to select the whole table.
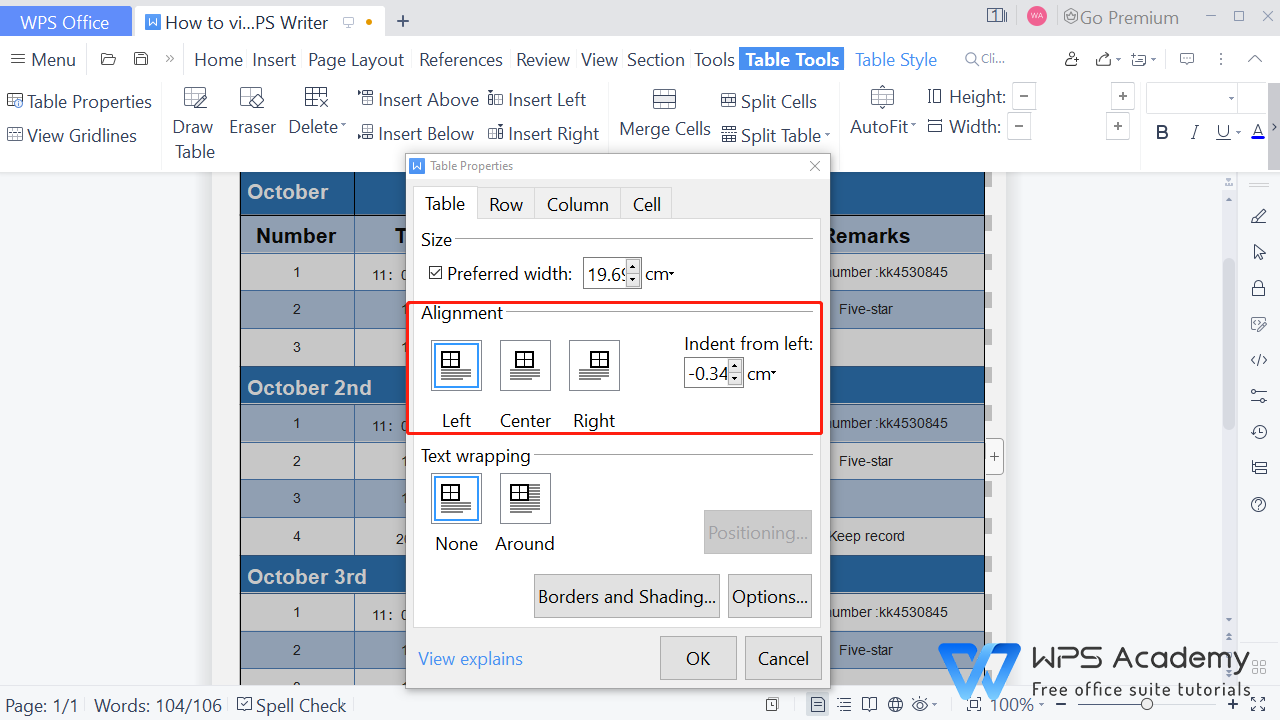
3. Click the Table Tools tab → the Table Properties button. Then the Table Properties dialog will pop up.

4. Under the Table tab, we can view the specified width of the table in the Size area.

5. In the Alignment area, we can view the alignment of the table.

6. In the Text wrapping area, we can choose None or Around to change the position of the table in the document flexibly.

7. We can click the Options button to set the cell margins or spacing in the table. If we want to adjust the cell margins of the table according to the text in the table, we can check Automatically resize to fit contents.

8. We can click the Borders and Shading button to set the borders and shading of the table. In the pop-up dialog, we can set the line style, Color and Width of the table. Under the Shading tab, we can choose the fill color and patterns of the table.

To be office excel advanced, you could learn how to use WPS Office Spreadsheet online in WPS Academy.
Also Read:
- 1. How to automatically adjust table columns in WPS Writer
- 2. How to change properties of excel file on Mac (Step by Step)
- 3. How to erase the borders of a table in WPS Writer
- 4. How to quickly sum the table data in WPS Writer
- 5. How to repeat header rows of a table in WPS Writer
- 6. How to insert a table in WPS Writer
