In presentations, grabbing attention is important. Picture making your PowerPoint slides interesting by easily adding cool borders. Our simple guide in 2023 helps you do just that. Learn how to make your content stand out and be creative. Join us on a journey to make your PowerPoint experience awesome!
Part 1: How to Insert a Border in PowerPoint on Windows/Mac (Easy Steps)
Want to add cool borders to your PowerPoint slides but don't know how to Insert a Border in PowerPoint on Windows and Mac? Simply follow these simple steps to add a border to Windows or Mac. We've used big words and pictures to keep things simple. Let's get this party started!
Step 1: Open your PowerPoint presentation and navigate to the slide where you want to add a border.
Step 2: Click on the slide to which you want to apply the border.
Step 3: Go to the Insert Tab: At the top of the screen, find the "Insert" tab. Click on it to reveal insert options.
Step 4: Look for the "Shapes"option. Click on it to open a drop-down menu with various shape styles and select the rectangles category.
Step 5: Fill the slide with rectangle and go to format option
Step 6: Right click and choose format shape from the list
Step 7: Select no fill and customize your border lines
Step 8: You have successfully added a border to your PowerPoint slide on Windows! Enjoy making your presentations visually engaging.
Part 2: How to Customize a Border in PowerPoint
If you want to unleash your creativity into the border in Powerpoint! You can customize your borders with our step-by-step guide by using the Bing Image Search.
Here is the step-by-step guide of using Bing Image Search:
Step 1: Open your PowerPoint presentation and navigate to the slide where you want to add a border.

Step 2: Click on the slide to which you want to apply the border.

Step 3: Go to insert tab on the ribbon and hover the pictures option. Select Online Pictures

Step 4: Search for the type of border you want such as flower border, line border, etc.

Step 5: Insert the border you want to the slide

Step 6: Congratulations, you have successfully added a border to your PowerPoint slide on Windows!

Additional tips:
To make all slides look the same, just copy the border from one slide and paste it onto the others. However, using this way will consume a lot of time if you wish to insert this border for hundreds of slides. In this situation, save it as your slide theme template. So you can reuse the template whenever you want.

Part 3:Best Free Alternative to Microsoft Office - WPS Office
What Is WPS Office?

Microsoft Office has been the market leader in office productivity software for decades, offering robust applications such as Word, Excel, and PowerPoint. However, with the rise of cloud-based solutions and the increasing demand for cost-effective options, free alternatives like WPS Office have gained popularity.
Why should you choose WPS Office as an alternative to Microsoft Office?
Here are the answer:
● Free to use Word, Excel, and PPT. Powerful PDF toolkit
● Rich template store, which contains various free and paid templates for Word, PPT, and Excel
● Rich functions
● The light weight of the product is only 200M, and it occupies a small amount of computer memory. It is suitable for Win7, 10, and 11
● The MAC version of WPS Office is very powerful. Microsoft office ignores the experience of mac users, which can be made up by wps office
● Supportonline documents (WPS AirPage), multi-person collaborative editing
● WPS office also supports Linux systems, Android, and ios systems. To use WPS office products on different systems, you only need to log in to the same account, and all files can be synchronized
You feel WPS Office is the best choice for you and want to download? Don’t worry, below is step by step how to download WPS Office:
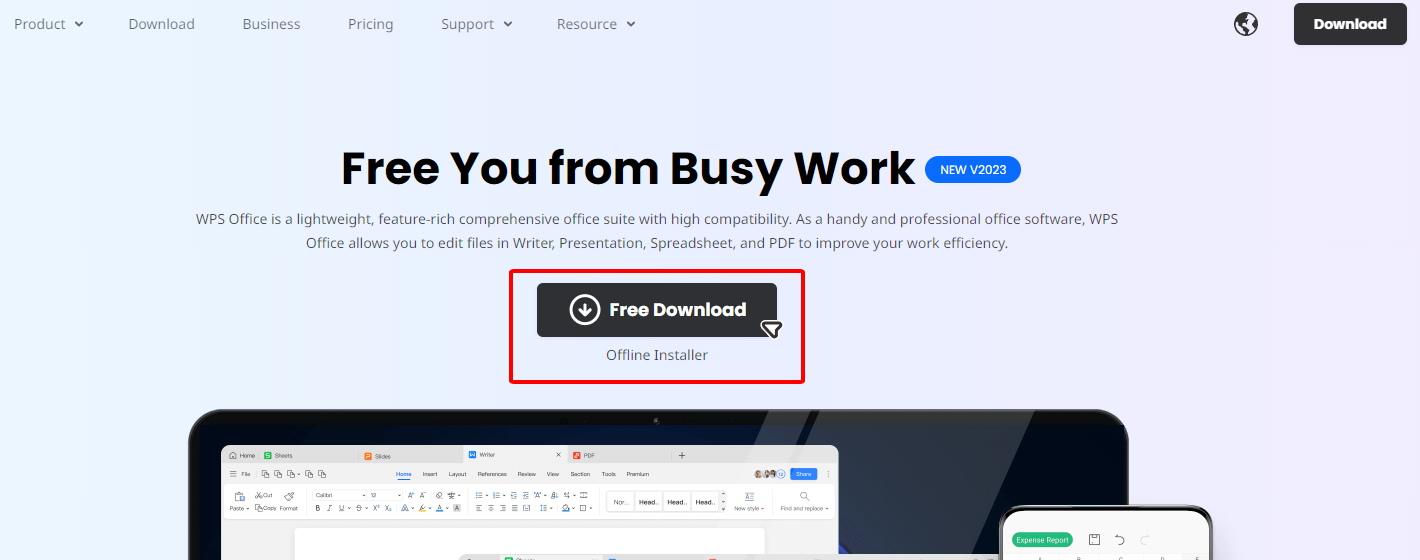
Step 1: Visit the WPS Office website:wps.com.
Step 2: Click “ Free Download” button

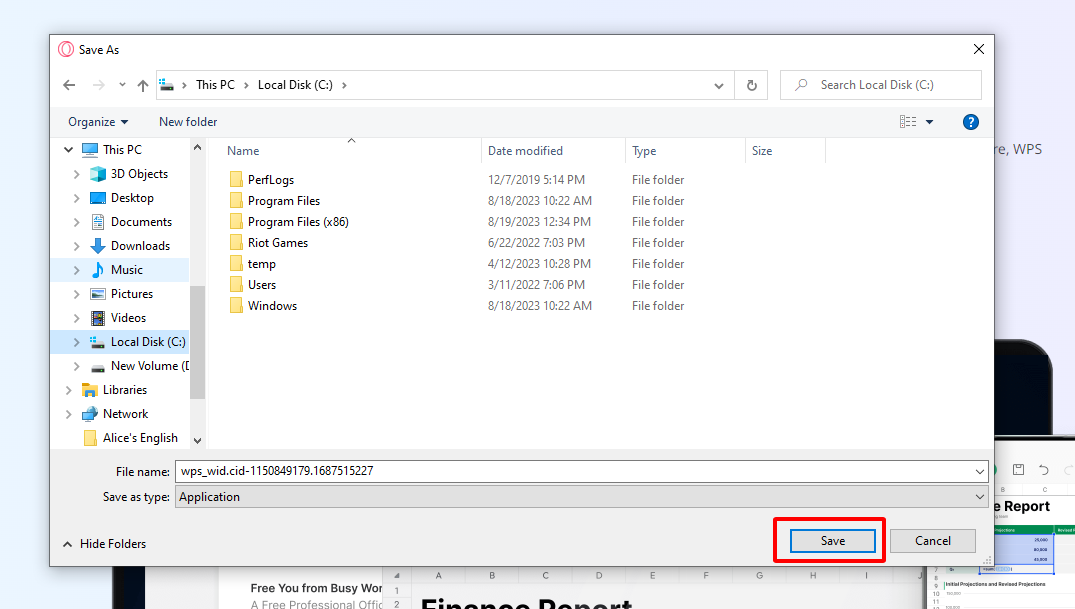
Step 3: Select the place you want to save WPS Office -> Save

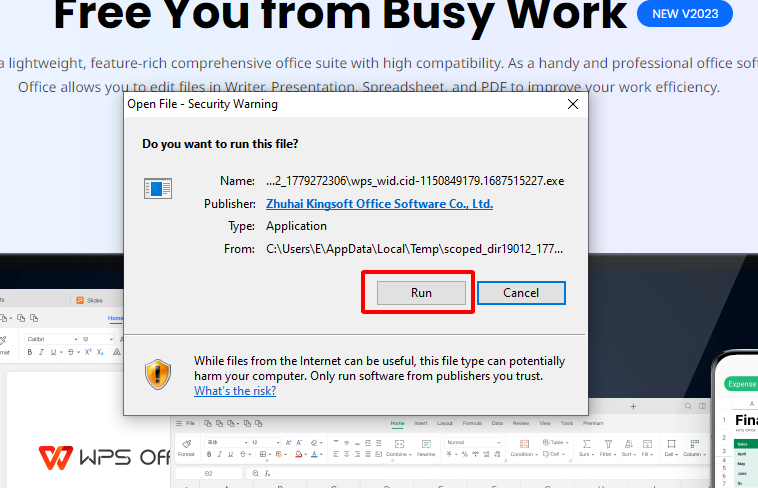
Step 4: Double click on the WPS Office file in your Download file, click “Run” and follow the on-screen instructions to install

Step 5: After complete, you can enjoy all the power of WPS Office
Part4: How to Add a Border in PowerPoint Using WPS Office?
Enhance your slides with WPS Office borders! Follow these easy steps to add stylish borders effortlessly.
Step 1: Open your PowerPoint presentation and navigate to the slide where you want to add a border.

Step 2: Click on the slide to which you want to apply the border.

Step 3: Go to the Insert Tab. Click on it to reveal insert options.

Step 4: Look for the "Shapes"option. Click on it to open a drop-down menu with various shape styles and select the rectangles category.

Step 5: Fill the slide with rectangle and select non fill-solid line

Step 6: Right click on the border and choose format object from the list

Step 7: Select no fill and customize your border lines

Step 8: You have successfully added a border to your PowerPoint slide on Windows! Enjoy making your presentations visually engaging.

Our experience with the WPS Office step-by-step guide on how to add a border in PowerPoint using WPS Office and found it to be comprehensive and easy to follow. It should be easy for anyone to follow, even if they are not familiar with WPS Office.
FAQs
Q1: Can I add a gradient border to an object in PowerPoint?
A1: PowerPoint doesn't natively support gradient borders, but you can get creative. Create the illusion of a gradient border by adding a rectangle with a gradient fill behind the object, bringing a unique touch to your designs.
Q2: Can I animate the border of an object in PowerPoint?
A2: Yes! PowerPoint allows you to animate object borders. Apply effects like "Entrance," "Emphasis," or "Exit" to bring dynamic movement to objects with borders. This adds an engaging and lively element to your presentations.
Q3: Is it possible to customize the thickness of borders in PowerPoint?
A3: Absolutely! You have the flexibility to adjust the thickness of borders in PowerPoint. Explore the "Format" or "Design" tab, depending on your version, to fine-tune the border thickness according to your preferences.
Q4: Can I copy and paste borders between slides in PowerPoint?
A4: Certainly! For a consistent look, easily copy the border from one slide and paste it onto others. This quick technique ensures uniformity across your presentation without the need for repetitive manual adjustments.
Q5: Are there pre-designed border templates available in PowerPoint?
A5: Yes, PowerPoint offers a variety of pre-designed border templates. Explore the "Design" or "Themes" tab to access a range of ready-to-use border styles, saving you time and adding a professional touch to your slides.
Summary:
Transform your PowerPoint presentations with flair using our step-by-step guide on adding borders, placing a spotlight on the user-friendly capabilities of WPS Office. Seamlessly navigate through the process, from accessing the Format panel to tweaking outline preferences. Bold colors, vivid screenshots, and clear keywords amplify the clarity of each step. Elevate your slides effortlessly, harnessing the power of WPS Office to add a touch of professionalism and visual appeal. Upgrade your presentations with confidence!


